Friday, October 30, 2009

More Tie Dye, Etc.

I got to go back and hang out with a pal on Thursday for some more tie-dye-and-talk time. Yay!

Who says rainbows can't be for boys?


This is a flower. The two leaves were an afterthought, which is why they're so small.


This was an experiment. I hand-gathered the snaky line, just to see if it was possible, then decided to make it an art piece. It's titled Infiltration, and it's a war between warm and cool colors. A few "agents" from each side have infiltrated the other side. Oooh, artsy.


This was also an experiment. It involved a snowflake fold, chopsticks, and binder clips. I'm particularly proud of the gradient.


After Charlie checked out his previously-dyed blood shirt, he realized that they had given him the wrong size. So he dyed his other blood shirt just like it (only he decided to make the starburst originate from a different point on the back of the shirt, just to see if he could).


I also made a second attempt at a butterfly, and reeeeeeally love this one! I spread it out when I dyed the background so it wouldn't be symmetrical. I even got a little black "tail" at the bottom of each wing (and I loooove the b&w "bits" around each wing, too).


We had a great family play date down at the park by the creek a week or two ago. Caspian and Charlie explored and threw pebbles in the creek, while Perrin and I played on a blanket. The city was there mowing and trimming, but it didn't affect us. We did leave when they started spraying, though. :P The funny thing about this picture is that it represents how little personal space Perrin will probably grow up to have! He gets kissed and smooshed all the time.


A few days ago, Caspian said he didn't want lunch, then he said he wanted a hand for lunch. Yes, a hand. So I asked him, "If I got you a hand for lunch, would you eat it?" He looked really surprised, but said yes...so I cut one out of a tortilla! He thought it was awesome. He kept saying, "Just three fingers left!...Just two fingers left!"
Yes, my child likes to spend his days in his Underoos. No, you can't see. :p


I finally got to do my nails during naptime on Thursday, and they were gorgeous...until we had family play time that night. Yes, I sacrificed my manicure to the Lego gods — I am officially a Mom of Boys™. We did make a pretty rockin' split-level house, though, by connecting our three
green boards with flat blocks. There's a couch (with "drink"), three arm chairs, a coffee table, two stand lamps, and a bed. Caspian added the fence in front "to keep the dog in" but ended up parking his cars there instead. Considering our severely limited Lego inventory, I think it looks darn awesome!


Caspian came up with this "man on stilts" all by himself.


Final crafting news for the night: I finally got to go one of our local library's monthly craft days! Even better, my mom went with me! It was awesome. We made pop tabs into bracelets and turned Scrabble tiles into pendants. I'll post pics later. There are enough pics in this post already!


This post originally appeared on my family blog and is reprinted with permission.

Thursday, October 29, 2009

How to Tie Dye Stuff

(Thanks to the incomparable Deb for teaching us about tie dye "way back when" and for providing supplies...and her house! LOL)
  1. Get anything white you can find in your house and launder it.
  2. Now that you've done some laundry, you'll feel less guilty about using your entire afternoon for some crafting. (ha ha ha, so witty)
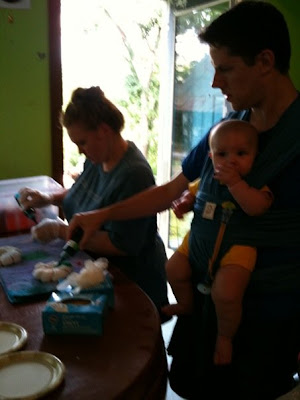
  3. Decide which white things would look better in color (anything with that inexplicable yellow stain whites get is a great candidate) and tie them up. Use rubber bands, chopsticks, needle and dental floss, knot the fabric, twist, fold, etc. — use your imagination! Swirls and gathers are more easily accomplished when the cloth is wet, so it'll cling to the work surface as you go. This is a safe time to wear your sleeping baby, if you so desire.

  4. Give your toddler a sword so he doesn't get dye on him later. (We actually planned to let him dye, but Legos and playing outside trumped his desire to participate. He just chose colors instead.)

  5. Soak anything but silk in a soda ash bath for at least 20 minutes (plastic tubs with lids work great). Soak silk in white vinegar for 30 minutes instead (gallon ziplocks work fine, just turn over periodically). This will help the dye to adhere better.
  6. Lay out "crap towels" and don "crap clothes" and latex gloves — preferably using a new glove set for each piece.
  7. Working one piece at a time, squeeze out excess liquid (soda ash or vinegar) and dye! Squirt bottles (not spray) are easy to control and allows for some really neat design options. We were told that dye spread more easily in silk and that blue didn't stick, but we didn't find either one to be true. (It's "safe" to wear your baby on this step only if you have long arms and a docile baby.)

  8. For anything but silk, wrap the dyed piece completely in plastic wrap and put in a gallon ziplock (you can put multiple pieces in one bag). For silk, put each piece in its own gallon ziplock, squeeze the air out, and seal it.
  9. If the towel is saturated through, toss it in the "used" pile and get a new one; otherwise, fold it inside out until you find a clean spread to use for the next piece. Toss towels in the dryer to set dye so you can use the towel again for another piece.

  10. Repeat steps 6-8 until you've run out of white things to dye. For anything but silk, seal up the gallon ziplocks and leave them alone for up to a day — the longer, the better. For silk, put the sealed ziplocks in the microwave on high for 45 seconds. Wait until any bubbling subsides then do another 45 seconds. Wait again, then do 30 seconds. Leave the bags in the microwave until they cool off — they will be boiling hot! After the silk has cooled, remove the pieces and follow the steps below.

  11. Since it's the next day (or later in the day, for silk), put "crap clothes" on again.
  12. Remove one dyed piece from the ziplock and discard the plastic wrap.

  13. Rinse the piece under cold running water (in a tub or deep sink) as you squeeze. Start with the lightest color up highest, so the darker dye doesn't run into the light areas. Squeeze and rinse constantly until water runs somewhat clear.

  14. Remove or cut off rubber bands and continue rinse&squeeze-ing until water runs clear. Open piece as you go to allow clean water to get into all the folds and crannies. Squeeze excess water out.


  15. Lay out each piece on a clean "crap towel" as you finish it. If space is at a premium, you can layer a new "crap towel" on top of the pieces laying on the first towel, then top it with more pieces.
  16. When you're finished (or you've done a lot), put pieces in washing machine on the hottest water the fabric can stand. Wash with detergent as usual, with extra rinses thrown in wherever possible.
  17. Peek during the final rinse's swishy part. If there's a lot of dye still coming out, run it all through again (no soap necessary this time).
  18. Toss dryables in the dryer; hang dry non-dryables.

Be prepared — the first (few?) time(s) you wear your pieces, dye will rub off on you (which is kind of cute when it's a diaper on a baby's newly-blue bum). DO NOT pair these pieces with your favorite khaki pants or white tank top until they've been washed severalseveralseveral times.

silk pillowcases

Charlie's old hankies made new

Charlie's blood donation shirt, made-over

heart cape/wall-hanging (attach cape closure at top or sew it into a rod pocket)

butterfly cape/wall-hanging (gathered the butterfly with dental floss) (I'm thinking about doing something to create a body and antennae...)

forest play cloth (doubles as alien planet play cloth) with space for a winding road

dark/night and day/light play cloths

Caspian's shirt

Perrin's and Caspian's polos (a tie dye polo says, "I want be formal, but I'm here to party") (the missing dye on the green collar really irks me)

Perrin's shortalls

secret project hint #1

secret project hint #2

secret project hint #3

Okay, I'm going to start an Etsy store, and I was thinking about selling my cape/wall-hangings, among other tie dye items and sundry things. What do you all think?? Here are two more (the original ideas) that I made specifically as capes, for Caspian and a friend (for Christmas). They are deliberately "Batman-colored."

Click the picture set below for a larger view of Caspian's cape test. It passed the color test (in picture 4, unbidden, he cried, "I'm Batman!") and the fun test (he refused to take it off all afternoon). It is modeled with briefs, in true Superhero tradition (no tights, sorry).

My goal now is to figure out what kind of closure to use...

All images, concepts, and designs are ©KatrinkaJane 2009


This post originally appeared on my family blog and is reprinted with permission.

Wednesday, October 28, 2009

How to Make-Over a Glass Lazy Susan, part 3 (plus a Dry Erase Calendar)

  1. Decide you're not going to let that st*pid paint get the best of you. You'll use cutouts from that hydrangea paper on something, but not this blasted lazy susan.
  2. Try removing the fruity "paint" with acetone nail polish remover (husband's idea). FAIL
  3. Try removing the fruity "paint" with a pink-handled razor blade. FAIL

  4. Accidentally scratch paint you actually want on there, when removing lazy susan from sink. FAIL


  5. Check out mineral spirits and paint thinner at Wal-Mart. Budget FAIL
  6. Find the perfect all-purpose spray-on primer at Michael's. WIN
  7. Forget 40% off coupon, necessitating return trip. FAIL
  8. Realize that you can now justify a return trip to Lexington on Monday, thereby creating an excuse to get free Chick-Fil-A sandwiches. WIN
  9. In the meantime, do another project!


How to Make Your Own Dry-Erase Calendar
  1. Find or buy an oblong frame.

  2. Remove the "innards" (mat, background paper, etc.) and paint the frame, if desired (AKA "if you remember before fastening it all back together and writing this tutorial"). While it's drying, clean the glass on both sides with Windex. Don't let your cat sit on it.
  3. Decide on a layout and dimensions for your calendar (my glass was 18"x34", and my margins were 1.25", so my calendar was 15.5"x31.5"; each column was 4.5" wide, the days of the week row was 2" tall, the main space was 10.5" tall, and the "next week" row was 3" tall; I arbitrarily drew the header for the "next week" row).

  4. Take a Sharpie, a ruler or yard stick, and (if you're lucky) a large ruled cutting board and mark out the lines and words you want as default on your calendar on the wrong side of the glass.

  5. If you severely screw up, use some acetone nail polish remover on a Q-Tip to "erase" your mistakes (or, if you're lucky enough to be drawing on a removable protective plastic film, just smudge it off).

  6. When your toddler wakes up from his nap, take a break for a day or two because your project is "on top of the road, mommy".

  7. Turn the glass over and carefully trace over all of your lines and words with a Sharpie. Consider using different marker widths (I used a Fine Point, a Chisel Tip, and a Magnum 44). Do any designs or decorations you want permanently on the calendar (leave it decorationless if you want to customize it monthly or seasonally).

  8. If, hypothetically, you hate any impromptu decorations you try to do with dry erase markers, be sure to scrub them off with a dry paper towel. While the term "dry erase" may seem misleading, it actually won't come off when you use something wet, like, oh, nail polish remover. I'm just sayin'.


  9. Check for Sharpie flubs and fix them with acetone nail polish remover on a Q-Tip.

  10. Ask your supervisor if he thinks your project is acceptable.

  11. Turn the glass back over and (if applicable) remove the protective film. If you want to erase your guidelines from step 4, do it now using acetone nail polish remover (don't get any on the back).

  12. Realize that, contrary to the test patch and general common sense, the dry erase marker used for decorating did, in fact, rub off some of the Sharpie.

  13. Fix it on the "right" side of the glass.

  14. Fill in your week's activities, with accompanying pictures for your toddler's benefit.


  15. Get really excited when your toddler recognizes your sketch of a Batman mask (to signify that he's going to play with a friend, who has one) — WIN. Realize that your reflection is showing up in your pictures — FAIL. Feel relieved that you're clothed — WIN.


We really needed a large weekly calendar to start using for family things, and to help teach Caspian about the days of the week (and make it less confusing when we say, "We're doing ___ on Tuesday"). Imagine my happiness when I saw this entry for this contest! We even had a suitable frame sitting around unused (albeit with plexiglass instead of real glass, but it passed the marker test). I'd originally purchased it to make a gift for my college French professor, but that never happened.

The great thing about this project is that you can customize your dream calendar (time span, labels, dates/days, etc.). Now I just have to figure out what to do with the leftover mat. Any ideas? It's pretty flimsy, but it's white on both sides (one matte, one shiny). I keep wanting to cut out each individual "frame"...but for what...?


This is another neat weekly calendar idea, especially to use for older children! Can't you just see each child's cube stacked on top of or laid next to each other on top of a little shelf above your family's regular calendar?


This post originally appeared on my family blog and is reprinted with permission.