
Ever since I started using our picture-frame-turned-dry-erase-calendar to plan our meals, life has been so much easier! Well...not really, but it is a lot easier to say "look at the board" when my husband asks what's for dinner. And it's definitely less stressful to plan ahead for crazy days by cooking extra a day or two before. Plus, with my post-partum memory (or lack thereof), I love getting it all figured out in a moment of clarity.
In addition to putting the contents of our meal, I also write the total prep-and-cooking time required, to avoid realizing at 4:30 that the meat had to be thawed the day before. We're still perfecting our system, but for now, red marker means actual cooking, purple means leftovers/easy/eat out, and black means activity/event.
I plan lunches too, simply because I don't want any leftovers to go to waste in the back of the fridge. If it's on the board, we eat it. My week really should start on Thursday, since we grocery shop every Wednesday, but oh well. One of these days I'm going to start planning two weeks at a time, just so I can fill in the entire darn thing (yes, I'm a C like that). Most of my recipes are saved on Delicious, which is the most awesome bookmarking site ever.
SUNDAY
L ~ leftover (LO) Tuna & White Bean Salad with Pita Chips (this time made with pinto & navy mix and double tuna; best with garbanzos and single tuna) WIC-friendly!
D ~ crockpot (CP) Chicken & Brown Rice Casserole with canned green veggies (needs extra seasoning, like garlic powder and more salt; I used a large onion FAIL and should've left the lid off a little at the end so the rice would be less mushy FAIL; this was, however, my first time using foil in my 6qt crock to make a 4qt recipe WIN)
MONDAY
L ~ Clean Out the Fridge (ended up being baby spinach and LO turkey grilled cheese with LO acorn squash)
D ~ LO Chicken & Brown Rice Casserole with LO sweet potatoes
TUESDAY
L ~ ???
D ~ wheat spaghetti with frozen veggies in the sauce and frozen meatballs (LO from my Open House) with baby spinach salad and LO wheat rolls
WEDNESDAY
L ~ $7 McDonald's Day!
D ~ Papa Murphy's Pizza Day!
THURSDAY
L ~ Asbury College Cafeteria with Aunt Amie
D ~ Spaghetti Frittata (made with LO spaghetti and meatballs) with baby spinach salad
FRIDAY (pancake day!)
L ~ LO pizza
D ~ earned dinner with Steamrollers Club
SATURDAY
L ~ ???
D ~ scrambled eggs with bacon, fruit, and mini bagels
SUNDAY (sausage with LO pancake day!)
L ~ eat at in-laws
D ~ super-easy CP barbecue chicken with canned green veggies and boxed mashed potatoes
Monday, November 30, 2009
Sunday, November 22, 2009
Say "No" to Wrap Rage
Dreading the thought of opening yet another adult-proof clamshell case this Christmas?
Tired of the 8,062 twisty ties that secure every new toy?
Whether you're opening toys or electronics, Amazon's Frustration-Free Packaging is here to save you the hassle...and save you money!
Amazon will eliminate all the excess packaging waste (yay! environmental!), re-pack your item in a plain cardboard box (2005 National Toy Hall of Fame inductee), and ship it to you, ready to assemble immediately Christmas morning! The BEST part is that it also costs LESS to get a toy that way. Double bonus! Be sure to click on the link above to watch a super-cute video about FFP...and to shop!
Tired of the 8,062 twisty ties that secure every new toy?
Whether you're opening toys or electronics, Amazon's Frustration-Free Packaging
Amazon will eliminate all the excess packaging waste (yay! environmental!), re-pack your item in a plain cardboard box (2005 National Toy Hall of Fame inductee), and ship it to you, ready to assemble immediately Christmas morning! The BEST part is that it also costs LESS to get a toy that way. Double bonus! Be sure to click on the link above to watch a super-cute video about FFP...and to shop!
Saturday, November 21, 2009
Secondhand Scores ~ Leather & Links
After making a bunch of post-"Customer Appreciation Open House" deliveries, I stopped in to the Salvation Army Thrift Store to see if they still had the large clock I saw the last time I was there. It was big and wooden and ripe for "rescue," but we didn't need a clock — much less a big one. Two days after spotting that clock the first time, Caspian stepped on our living room clock and smashed the glass (he was fine). Anyway, the clock wasn't there, but this was:

A 3-piece canister set shaped like a rustic fairy tale castle! Even the turrets lift off separately. $5.99, people. DH's response when I texted him this cell phone picture? "Cool. Too bad we don't need canisters..." Sigh. God gave me a voice of reason for a reason, I guess.
Before I left, I scooted over to the cloth napkin section to see if the bag o' napkins we tried to buy last time had been labeled with a price sticker, and therefore rendered buyable. No such luck...but on the way to the cloth napkin section, I passed the handbag section! Woo-hoo! I actually found a good-sized tote (not too big), in a color I like (red), with the pockets I need (lots, plus dividers), out of a sturdy material (leather)! It even has little metal feet on the bottom to keep it out of the ick. It's missing one strap, but the way the strap attaches allows it to be used as a one-strap shoulder bag (and it passed the one-handed-shoulder-lift test). The three interior cell phone-type pockets have all had their bottoms busted out, but that's an easy fix (I assume) — other than that, no stains, no rips, no marks. It still has the detachable coin purse, too. Technically, it's a Samsonite laptop tote, so one of the divided sections is padded. I'm planning to put a pin or a flower or something on the extraneous buckle.


Wait, OMGosh, seriously?!? I just looked it up online and this is it! MSRP $129.99, retail $99.99, KatrinkaJane special...$2.99!!! SCORE!
Well, that just totally made my day just now. Back to shopping, though. On the way home, the kids were both asleep when we passed our local Habitat for Humanity ReStore, which happens to be linked to the local Vendor's Mall. I ♥ flea markets — not the ones that try to resell a bunch of outdated-but-technically-NIP leftover hardware store and novelty dream catchers (you know the ones), but the ones heaped with used goodies. It's like a treasure hunt! STOP. FOCUS. Okay, so the boys were both asleep, so I left DH in the car and stopped in to see if I could find a clock. I was also looking for another big picture frame to hang empty on the wall for posting Caspian's rotating stock of artwork. Shockingly, I got distracted by books, jewelry, and office supplies. Fortunately for me, they are perpetually on my shopping list. heehee Here's what I ended up taking home with some more of my leftover birthday money (not the stuff in the back; this table is also my MK gift-wrapping station):


one of the few Berenstain Bears books not already in our collection: $0.25
set of 3 paper trays, which I desperately needed for my desk: $1.50
old-school Oscar the Grouch puzzle, perfect for Caspian's age: $0.25
chunky 17"x17" carved-wood frame: $1.00
totally on-trend chain necklace: $4.99
TOTAL: $7.99, plus tax
Is it silly that I'm still giddy over my leather bag...?


A 3-piece canister set shaped like a rustic fairy tale castle! Even the turrets lift off separately. $5.99, people. DH's response when I texted him this cell phone picture? "Cool. Too bad we don't need canisters..." Sigh. God gave me a voice of reason for a reason, I guess.
Before I left, I scooted over to the cloth napkin section to see if the bag o' napkins we tried to buy last time had been labeled with a price sticker, and therefore rendered buyable. No such luck...but on the way to the cloth napkin section, I passed the handbag section! Woo-hoo! I actually found a good-sized tote (not too big), in a color I like (red), with the pockets I need (lots, plus dividers), out of a sturdy material (leather)! It even has little metal feet on the bottom to keep it out of the ick. It's missing one strap, but the way the strap attaches allows it to be used as a one-strap shoulder bag (and it passed the one-handed-shoulder-lift test). The three interior cell phone-type pockets have all had their bottoms busted out, but that's an easy fix (I assume) — other than that, no stains, no rips, no marks. It still has the detachable coin purse, too. Technically, it's a Samsonite laptop tote, so one of the divided sections is padded. I'm planning to put a pin or a flower or something on the extraneous buckle.


Wait, OMGosh, seriously?!? I just looked it up online and this is it! MSRP $129.99, retail $99.99, KatrinkaJane special...$2.99!!! SCORE!
Well, that just totally made my day just now. Back to shopping, though. On the way home, the kids were both asleep when we passed our local Habitat for Humanity ReStore, which happens to be linked to the local Vendor's Mall. I ♥ flea markets — not the ones that try to resell a bunch of outdated-but-technically-NIP leftover hardware store and novelty dream catchers (you know the ones), but the ones heaped with used goodies. It's like a treasure hunt! STOP. FOCUS. Okay, so the boys were both asleep, so I left DH in the car and stopped in to see if I could find a clock. I was also looking for another big picture frame to hang empty on the wall for posting Caspian's rotating stock of artwork. Shockingly, I got distracted by books, jewelry, and office supplies. Fortunately for me, they are perpetually on my shopping list. heehee Here's what I ended up taking home with some more of my leftover birthday money (not the stuff in the back; this table is also my MK gift-wrapping station):


one of the few Berenstain Bears books not already in our collection: $0.25
set of 3 paper trays, which I desperately needed for my desk: $1.50
old-school Oscar the Grouch puzzle, perfect for Caspian's age: $0.25
chunky 17"x17" carved-wood frame: $1.00
totally on-trend chain necklace: $4.99
TOTAL: $7.99, plus tax
TODAY'S LESSONS:
1. Keep an eye out for respected brands (Samsonite caught my eye).
2. Watch for high-quality materials (genuine leather will stay usable for years).
3. Check out specialty secondhand stores (like ReStores), which may offer random items at great prices.
1. Keep an eye out for respected brands (Samsonite caught my eye).
2. Watch for high-quality materials (genuine leather will stay usable for years).
3. Check out specialty secondhand stores (like ReStores), which may offer random items at great prices.
Is it silly that I'm still giddy over my leather bag...?
Wednesday, November 18, 2009
Roadkill Rescue ~ Halloween 2009

Yeah, yeah. I keep crashing Beckie's parties with technicalities (and yes, I am still working on that darn lazy susan that started it all). Honestly and truly, I have an actual "Roadkill Rescue" in my living room that is this ===> <=== close to being finished, but we haven't had a chance yet, with my annual Customer Appreciation Open House a couple weeks ago. So, here's my entry for this shindig: a Halloween costume. Yes, most of it was free and "rescued" from various friends' "Do you want this, before I throw it away?" piles.
Our big conundrum this year was "What kind of costume can we do if the baby's in the Moby Wrap?" I have to be honest — my very first immediate thought was the alien-emerging-from-the-stomach scene. But let's be practical, shall we? The baby's head would be sticking out much too high to pass for a real gastrointestinal alien. So we went with my second brainstorm...
- Take one "free" baby (don't get me started) and one free Moby Wrap (thanks, mom & dad!).
- Add a free "MKmen" ball cap, borrowed coveralls (thanks, Deb!), and borrowed work gloves (thanks, FIL!).
- Add a smokin'-hot daddy (thanks, God!).
- Take a sheet of free blue craft foam and spray it with paid-for grey primer. Greatly appreciate the splatter effect. Pretend it was a result of your mad spray painting skillz.

- Wear out a grey Sharpie trying to draw lines on top of the primed craft foam (see my little scribble sheet, where I tried to get the Sharpie juice flowing again?). In case you're wondering, the blue patch in the lower-right corner is where the clothespin held the craft foam, so I could spray it without getting my hands dirty (this was Halloween night, and the grass was wet). BTW, don't try denying that you want my leopard-print mouse (thanks, Duncan!).

- E-6000 two free orange balloons together, then decorate with a dark orange Sharpie. (Yes, I have a drawer just for "Fine" Sharpies...AND it's labeled with a label-maker label. Hate me.)

- Shell out real money for a used bathmat at Goodwill, add a free baby hat (which technically did come out of a garbage bag), lots of staples, and some more free craft foam, Sharpied brown and artfully cut up.

- Add four large safety pins and a free green onesie, then step back and revel in your homemade "Oscar the Grouch and his trashman, Bruno" costume! Roadkill Rescue Bonus: the costume is even trash-themed!


Tuesday, November 3, 2009
Works For Me Wednesday ~ Fancy-Schmancy Art
We love Saxton Freymann's carved food illustrations and thought his mini wall calendar would be perfect art to hang in the kitchen.

We finally found these cheap frames from IKEA to fit the square calendar pages (only a little trimming was required). The great part is that there are mini wall calendars available for just about every subject imaginable, from kittens to Impressionist art. What an easy and inexpensive way to get great art into your home! For larger prints, just scoop up a regular-sized calendar — they can even be secondhand!

I'd just like to point out how much you should appreciate my "keeping it real" with ya'll and showing my human side and all that. No staging here, folks — that's pure, unadulterated everyday mess you're seeing! :) Don't say I never gave you anything special.
This post originally appeared on my family blog and is reprinted with permission.

We finally found these cheap frames from IKEA to fit the square calendar pages (only a little trimming was required). The great part is that there are mini wall calendars

I'd just like to point out how much you should appreciate my "keeping it real" with ya'll and showing my human side and all that. No staging here, folks — that's pure, unadulterated everyday mess you're seeing! :) Don't say I never gave you anything special.
This post originally appeared on my family blog and is reprinted with permission.
Monday, November 2, 2009
More Library Craft Pics
Here are those pics I promised of the Scrabble tile pendants we made at the library. My cutouts are from "Mod Floral Pink" scrapbook paper by Vera Bradley. Once I realized that the bails would be glued on (and thus, render the pendants non-reversible), I used blank tiles for my second and third pendants. 'Cause I'm anal like that.

What a horrid photo. You can tell I'm not my husband.

You can see where I tried to add more Aleene's Paper Glaze after I realized it hadn't reached the bottom. I didn't bother with a close-up of the third tile, which became a disaster after I leaned over it carefully, checking for bubbles to pop, and dropped the straight pin flat in the middle of the semi-congealed Paper Glaze. Yeah, you can't fix something like that. At least when I wear it as a pendant, no one will be close enough to notice. (Or as I tell my clients, "If someone is that close, they don't care what it looks like.")

Here's the one "lettered" tile I used. Did you happen to notice my Lego-decimated manicure? Yes, I thought you might've.

This post originally appeared on my family blog and is reprinted with permission.
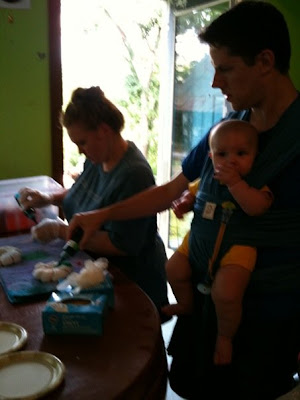
Library Craft, Etc.
Even though we're already using cloth diapers and wipes, we're looking for more ways to save money (and inadvertently go green in the process — bonus). I started using a crystal deodorant yesterday, and we're going to stop using disposable paper towels and napkins in favor of more dishtowels and cloth napkins (16 for $2.97 at Salvation Army). I really, really want to try soap nuts, too.
If you have a baby, you need to get Magic Stick, period. Go. Buy it. Wow. No, I'm serious — go.
I found this site recently, which has a LOT of printables (including coloring books). Yay!
As promised, here are the library crafts we made on Saturday. The pop can pull-tab bracelets are made just like these, only with fabric strips (folded like binding tape) instead of leather. One lady there made it long enough for a belt, and another did a headband with a flower! I think I might try spray painting the tabs and using ribbon instead of fabric, next time. My mom made hers like the ones on that site, with all the tabs "facing" the same direction; I did one-up-one-down instead, and it made a scalloped edge (cool). We sewed snaps on as closures and covered the snap top with a button. Trés chic, non?


The other craft was cutting out (Vera Bradley) scrapbook paper pieces, ModPodging them onto Scrabble tiles, and supergluing silver Aanraku bails on the back to make pendants. We also topped them with Aleene's Paper Glaze, to give them a snazzy "glass" finish. The bails covered up part of the back, so I used blank tiles for mine. I must get Paper Glaze! Wow. No pics yet, because the glaze is still milky-translucent.
This post originally appeared on my family blog and is reprinted with permission.
Friday, October 30, 2009
More Tie Dye, Etc.
I got to go back and hang out with a pal on Thursday for some more tie-dye-and-talk time. Yay!
Who says rainbows can't be for boys?

This is a flower. The two leaves were an afterthought, which is why they're so small.

This was an experiment. I hand-gathered the snaky line, just to see if it was possible, then decided to make it an art piece. It's titled Infiltration, and it's a war between warm and cool colors. A few "agents" from each side have infiltrated the other side. Oooh, artsy.

This was also an experiment. It involved a snowflake fold, chopsticks, and binder clips. I'm particularly proud of the gradient.


After Charlie checked out his previously-dyed blood shirt, he realized that they had given him the wrong size. So he dyed his other blood shirt just like it (only he decided to make the starburst originate from a different point on the back of the shirt, just to see if he could).


I also made a second attempt at a butterfly, and reeeeeeally love this one! I spread it out when I dyed the background so it wouldn't be symmetrical. I even got a little black "tail" at the bottom of each wing (and I loooove the b&w "bits" around each wing, too).

We had a great family play date down at the park by the creek a week or two ago. Caspian and Charlie explored and threw pebbles in the creek, while Perrin and I played on a blanket. The city was there mowing and trimming, but it didn't affect us. We did leave when they started spraying, though. :P The funny thing about this picture is that it represents how little personal space Perrin will probably grow up to have! He gets kissed and smooshed all the time.

A few days ago, Caspian said he didn't want lunch, then he said he wanted a hand for lunch. Yes, a hand. So I asked him, "If I got you a hand for lunch, would you eat it?" He looked really surprised, but said yes...so I cut one out of a tortilla! He thought it was awesome. He kept saying, "Just three fingers left!...Just two fingers left!"
 Yes, my child likes to spend his days in his Underoos. No, you can't see. :p

I finally got to do my nails during naptime on Thursday, and they were gorgeous...until we had family play time that night. Yes, I sacrificed my manicure to the Lego gods — I am officially a Mom of Boys™. We did make a pretty rockin' split-level house, though, by connecting our three
green boards with flat blocks. There's a couch (with "drink"), three arm chairs, a coffee table, two stand lamps, and a bed. Caspian added the fence in front "to keep the dog in" but ended up parking his cars there instead. Considering our severely limited Lego inventory, I think it looks darn awesome!


Caspian came up with this "man on stilts" all by himself.

Final crafting news for the night: I finally got to go one of our local library's monthly craft days! Even better, my mom went with me! It was awesome. We made pop tabs into bracelets and turned Scrabble tiles into pendants. I'll post pics later. There are enough pics in this post already!
This post originally appeared on my family blog and is reprinted with permission.
Who says rainbows can't be for boys?

This is a flower. The two leaves were an afterthought, which is why they're so small.

This was an experiment. I hand-gathered the snaky line, just to see if it was possible, then decided to make it an art piece. It's titled Infiltration, and it's a war between warm and cool colors. A few "agents" from each side have infiltrated the other side. Oooh, artsy.

This was also an experiment. It involved a snowflake fold, chopsticks, and binder clips. I'm particularly proud of the gradient.


After Charlie checked out his previously-dyed blood shirt, he realized that they had given him the wrong size. So he dyed his other blood shirt just like it (only he decided to make the starburst originate from a different point on the back of the shirt, just to see if he could).


I also made a second attempt at a butterfly, and reeeeeeally love this one! I spread it out when I dyed the background so it wouldn't be symmetrical. I even got a little black "tail" at the bottom of each wing (and I loooove the b&w "bits" around each wing, too).

We had a great family play date down at the park by the creek a week or two ago. Caspian and Charlie explored and threw pebbles in the creek, while Perrin and I played on a blanket. The city was there mowing and trimming, but it didn't affect us. We did leave when they started spraying, though. :P The funny thing about this picture is that it represents how little personal space Perrin will probably grow up to have! He gets kissed and smooshed all the time.

A few days ago, Caspian said he didn't want lunch, then he said he wanted a hand for lunch. Yes, a hand. So I asked him, "If I got you a hand for lunch, would you eat it?" He looked really surprised, but said yes...so I cut one out of a tortilla! He thought it was awesome. He kept saying, "Just three fingers left!...Just two fingers left!"
 Yes, my child likes to spend his days in his Underoos. No, you can't see. :p
I finally got to do my nails during naptime on Thursday, and they were gorgeous...until we had family play time that night. Yes, I sacrificed my manicure to the Lego gods — I am officially a Mom of Boys™. We did make a pretty rockin' split-level house, though, by connecting our three
green boards with flat blocks. There's a couch (with "drink"), three arm chairs, a coffee table, two stand lamps, and a bed. Caspian added the fence in front "to keep the dog in" but ended up parking his cars there instead. Considering our severely limited Lego inventory, I think it looks darn awesome!


Caspian came up with this "man on stilts" all by himself.

Final crafting news for the night: I finally got to go one of our local library's monthly craft days! Even better, my mom went with me! It was awesome. We made pop tabs into bracelets and turned Scrabble tiles into pendants. I'll post pics later. There are enough pics in this post already!
This post originally appeared on my family blog and is reprinted with permission.
Thursday, October 29, 2009
How to Tie Dye Stuff
(Thanks to the incomparable Deb for teaching us about tie dye "way back when" and for providing supplies...and her house! LOL)
Be prepared — the first (few?) time(s) you wear your pieces, dye will rub off on you (which is kind of cute when it's a diaper on a baby's newly-blue bum). DO NOT pair these pieces with your favorite khaki pants or white tank top until they've been washed severalseveralseveral times.
silk pillowcases

Charlie's old hankies made new

Charlie's blood donation shirt, made-over

heart cape/wall-hanging (attach cape closure at top or sew it into a rod pocket)

butterfly cape/wall-hanging (gathered the butterfly with dental floss) (I'm thinking about doing something to create a body and antennae...)

forest play cloth (doubles as alien planet play cloth) with space for a winding road

dark/night and day/light play cloths

Caspian's shirt

Perrin's and Caspian's polos (a tie dye polo says, "I want be formal, but I'm here to party") (the missing dye on the green collar really irks me)

Perrin's shortalls

secret project hint #1

secret project hint #2

secret project hint #3

Okay, I'm going to start an Etsy store, and I was thinking about selling my cape/wall-hangings, among other tie dye items and sundry things. What do you all think?? Here are two more (the original ideas) that I made specifically as capes, for Caspian and a friend (for Christmas). They are deliberately "Batman-colored."

Click the picture set below for a larger view of Caspian's cape test. It passed the color test (in picture 4, unbidden, he cried, "I'm Batman!") and the fun test (he refused to take it off all afternoon). It is modeled with briefs, in true Superhero tradition (no tights, sorry).

My goal now is to figure out what kind of closure to use...
All images, concepts, and designs are ©KatrinkaJane 2009
This post originally appeared on my family blog and is reprinted with permission.
- Get anything white you can find in your house and launder it.
- Now that you've done some laundry, you'll feel less guilty about using your entire afternoon for some crafting. (ha ha ha, so witty)
- Decide which white things would look better in color (anything with that inexplicable yellow stain whites get is a great candidate) and tie them up. Use rubber bands, chopsticks, needle and dental floss, knot the fabric, twist, fold, etc. — use your imagination! Swirls and gathers are more easily accomplished when the cloth is wet, so it'll cling to the work surface as you go. This is a safe time to wear your sleeping baby, if you so desire.

- Give your toddler a sword so he doesn't get dye on him later. (We actually planned to let him dye, but Legos and playing outside trumped his desire to participate. He just chose colors instead.)

- Soak anything but silk in a soda ash bath for at least 20 minutes (plastic tubs with lids work great). Soak silk in white vinegar for 30 minutes instead (gallon ziplocks work fine, just turn over periodically). This will help the dye to adhere better.
- Lay out "crap towels" and don "crap clothes" and latex gloves — preferably using a new glove set for each piece.
- Working one piece at a time, squeeze out excess liquid (soda ash or vinegar) and dye! Squirt bottles (not spray) are easy to control and allows for some really neat design options. We were told that dye spread more easily in silk and that blue didn't stick, but we didn't find either one to be true. (It's "safe" to wear your baby on this step only if you have long arms and a docile baby.)
- For anything but silk, wrap the dyed piece completely in plastic wrap and put in a gallon ziplock (you can put multiple pieces in one bag). For silk, put each piece in its own gallon ziplock, squeeze the air out, and seal it.
- If the towel is saturated through, toss it in the "used" pile and get a new one; otherwise, fold it inside out until you find a clean spread to use for the next piece. Toss towels in the dryer to set dye so you can use the towel again for another piece.

- Repeat steps 6-8 until you've run out of white things to dye. For anything but silk, seal up the gallon ziplocks and leave them alone for up to a day — the longer, the better. For silk, put the sealed ziplocks in the microwave on high for 45 seconds. Wait until any bubbling subsides then do another 45 seconds. Wait again, then do 30 seconds. Leave the bags in the microwave until they cool off — they will be boiling hot! After the silk has cooled, remove the pieces and follow the steps below.

- Since it's the next day (or later in the day, for silk), put "crap clothes" on again.
- Remove one dyed piece from the ziplock and discard the plastic wrap.

- Rinse the piece under cold running water (in a tub or deep sink) as you squeeze. Start with the lightest color up highest, so the darker dye doesn't run into the light areas. Squeeze and rinse constantly until water runs somewhat clear.
- Remove or cut off rubber bands and continue rinse&squeeze-ing until water runs clear. Open piece as you go to allow clean water to get into all the folds and crannies. Squeeze excess water out.


- Lay out each piece on a clean "crap towel" as you finish it. If space is at a premium, you can layer a new "crap towel" on top of the pieces laying on the first towel, then top it with more pieces.
- When you're finished (or you've done a lot), put pieces in washing machine on the hottest water the fabric can stand. Wash with detergent as usual, with extra rinses thrown in wherever possible.
- Peek during the final rinse's swishy part. If there's a lot of dye still coming out, run it all through again (no soap necessary this time).

- Toss dryables in the dryer; hang dry non-dryables.


Be prepared — the first (few?) time(s) you wear your pieces, dye will rub off on you (which is kind of cute when it's a diaper on a baby's newly-blue bum). DO NOT pair these pieces with your favorite khaki pants or white tank top until they've been washed severalseveralseveral times.
silk pillowcases

Charlie's old hankies made new

Charlie's blood donation shirt, made-over

heart cape/wall-hanging (attach cape closure at top or sew it into a rod pocket)

butterfly cape/wall-hanging (gathered the butterfly with dental floss) (I'm thinking about doing something to create a body and antennae...)

forest play cloth (doubles as alien planet play cloth) with space for a winding road

dark/night and day/light play cloths

Caspian's shirt

Perrin's and Caspian's polos (a tie dye polo says, "I want be formal, but I'm here to party") (the missing dye on the green collar really irks me)

Perrin's shortalls

secret project hint #1

secret project hint #2

secret project hint #3

Okay, I'm going to start an Etsy store, and I was thinking about selling my cape/wall-hangings, among other tie dye items and sundry things. What do you all think?? Here are two more (the original ideas) that I made specifically as capes, for Caspian and a friend (for Christmas). They are deliberately "Batman-colored."

Click the picture set below for a larger view of Caspian's cape test. It passed the color test (in picture 4, unbidden, he cried, "I'm Batman!") and the fun test (he refused to take it off all afternoon). It is modeled with briefs, in true Superhero tradition (no tights, sorry).

My goal now is to figure out what kind of closure to use...
All images, concepts, and designs are ©KatrinkaJane 2009
This post originally appeared on my family blog and is reprinted with permission.
Subscribe to:
Posts (Atom)


