
- Get anything white you can find in your house and launder it.
- Now that you've done some laundry, you'll feel less guilty about using your entire afternoon for some crafting. (ha ha ha, so witty)
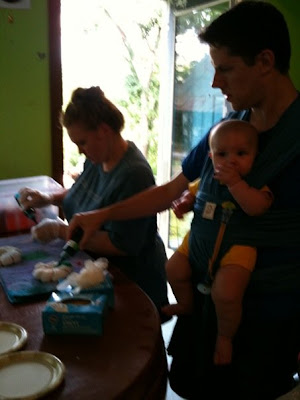
- Decide which white things would look better in color (anything with that inexplicable yellow stain whites get is a great candidate) and tie them up. Use rubber bands, chopsticks, needle and dental floss, knot the fabric, twist, fold, etc. — use your imagination! Swirls and gathers are more easily accomplished when the cloth is wet, so it'll cling to the work surface as you go. This is a safe time to wear your sleeping baby, if you so desire.

- Give your toddler a sword so he doesn't get dye on him later. (We actually planned to let him dye, but Legos and playing outside trumped his desire to participate. He just chose colors instead.)

- Soak anything but silk in a soda ash bath for at least 20 minutes (plastic tubs with lids work great). Soak silk in white vinegar for 30 minutes instead (gallon ziplocks work fine, just turn over periodically). This will help the dye to adhere better.
- Lay out "crap towels" and don "crap clothes" and latex gloves — preferably using a new glove set for each piece.
- Working one piece at a time, squeeze out excess liquid (soda ash or vinegar) and dye! Squirt bottles (not spray) are easy to control and allows for some really neat design options. We were told that dye spread more easily in silk and that blue didn't stick, but we didn't find either one to be true. (It's "safe" to wear your baby on this step only if you have long arms and a docile baby.)
- For anything but silk, wrap the dyed piece completely in plastic wrap and put in a gallon ziplock (you can put multiple pieces in one bag). For silk, put each piece in its own gallon ziplock, squeeze the air out, and seal it.
- If the towel is saturated through, toss it in the "used" pile and get a new one; otherwise, fold it inside out until you find a clean spread to use for the next piece. Toss towels in the dryer to set dye so you can use the towel again for another piece.

- Repeat steps 6-8 until you've run out of white things to dye. For anything but silk, seal up the gallon ziplocks and leave them alone for up to a day — the longer, the better. For silk, put the sealed ziplocks in the microwave on high for 45 seconds. Wait until any bubbling subsides then do another 45 seconds. Wait again, then do 30 seconds. Leave the bags in the microwave until they cool off — they will be boiling hot! After the silk has cooled, remove the pieces and follow the steps below.

- Since it's the next day (or later in the day, for silk), put "crap clothes" on again.
- Remove one dyed piece from the ziplock and discard the plastic wrap.

- Rinse the piece under cold running water (in a tub or deep sink) as you squeeze. Start with the lightest color up highest, so the darker dye doesn't run into the light areas. Squeeze and rinse constantly until water runs somewhat clear.
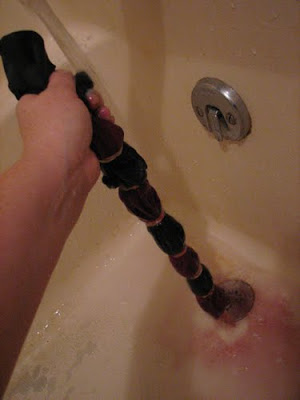
- Remove or cut off rubber bands and continue rinse&squeeze-ing until water runs clear. Open piece as you go to allow clean water to get into all the folds and crannies. Squeeze excess water out.


- Lay out each piece on a clean "crap towel" as you finish it. If space is at a premium, you can layer a new "crap towel" on top of the pieces laying on the first towel, then top it with more pieces.
- When you're finished (or you've done a lot), put pieces in washing machine on the hottest water the fabric can stand. Wash with detergent as usual, with extra rinses thrown in wherever possible.
- Peek during the final rinse's swishy part. If there's a lot of dye still coming out, run it all through again (no soap necessary this time).

- Toss dryables in the dryer; hang dry non-dryables.


Be prepared — the first (few?) time(s) you wear your pieces, dye will rub off on you (which is kind of cute when it's a diaper on a baby's newly-blue bum). DO NOT pair these pieces with your favorite khaki pants or white tank top until they've been washed severalseveralseveral times.
silk pillowcases

Charlie's old hankies made new

Charlie's blood donation shirt, made-over

heart cape/wall-hanging (attach cape closure at top or sew it into a rod pocket)

butterfly cape/wall-hanging (gathered the butterfly with dental floss) (I'm thinking about doing something to create a body and antennae...)

forest play cloth (doubles as alien planet play cloth) with space for a winding road

dark/night and day/light play cloths

Caspian's shirt

Perrin's and Caspian's polos (a tie dye polo says, "I want be formal, but I'm here to party") (the missing dye on the green collar really irks me)

Perrin's shortalls

secret project hint #1

secret project hint #2

secret project hint #3

Okay, I'm going to start an Etsy store, and I was thinking about selling my cape/wall-hangings, among other tie dye items and sundry things. What do you all think?? Here are two more (the original ideas) that I made specifically as capes, for Caspian and a friend (for Christmas). They are deliberately "Batman-colored."

Click the picture set below for a larger view of Caspian's cape test. It passed the color test (in picture 4, unbidden, he cried, "I'm Batman!") and the fun test (he refused to take it off all afternoon). It is modeled with briefs, in true Superhero tradition (no tights, sorry).

My goal now is to figure out what kind of closure to use...
All images, concepts, and designs are ©KatrinkaJane 2009
This post originally appeared on my family blog and is reprinted with permission.


0 comments:
Post a Comment