Looking for an alternative to a wreath or door hanger? Our glass door precludes many a dimensional wreath (due to squishing)...but the big blank brick wall next to the door was fair game!
For this outdoor piece, I repurposed an old window frame insert, found at the Habitat for Humanity ReStore...on 50% off day!!! It cost me a whole quarter. (BTW, when you see what all I got that day for a total of $10, you may hate me. Be sure to follow this blog anyway, to see what I do with it all.) I wasn't sure what I would do with the insert except hang things in the openings. Then I remembered our porch decor. Which, as of July 7, looked like this:


 Yes, that is a Christmas decoration. In July. We forgot to take it down when we put away the door wreath and haven't bothered/remembered since. It's better than a blank wall, right? Well, this is even BETTER! It even matches the brick and the deep red door.


If the paper looks familiar, you've probably seen my desk. That also makes this art piece a great transition between the outdoor decor and the indoor decor. In order to be able to reuse these now-discontinued patterns in a variety of sizes, we scanned the full sheets into the computer. Here's how I made the art piece:
This beauty just caught my eye, leaning up against some random cabinet at our local ReStore. The checkout gal told me it's supposed to be an insert in a window frame, but there was no frame there.
 100% wood!
It had four of what I thought were painted-over screws.


When I sat down with a screwdriver, it turned out they were heavy-duty pushpins.

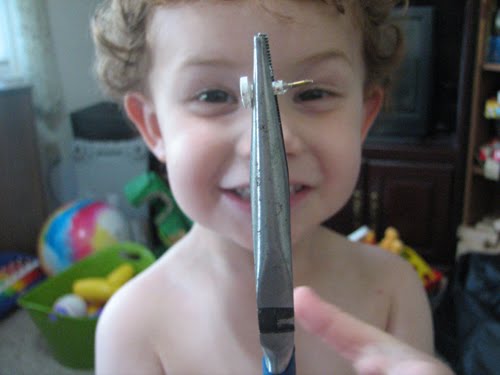
 Here come the pliers! I botched the first one (snapped the end off and had to really work to get the pin out), but my almost-4-year-old put me in my place.
After the kids were in bed, I tried mocking up a layout on my computer to see where I wanted each of my four designs to go. My computer kept crashing, so I fell back on using Unifix cubes from my college math manipulatives kit.

I had two lighter papers and two darker ones, so I rearranged and rearranged until I got a randomish pattern I liked.

Now, what to tie them together with...? Something that won't compete with the busy patterns. Something that will offset the geometrics with something softer and more girly. Why in the world did I even ever buy all that raffia? 'Cause it was a dollar, that's why. I went with the neutral, lacy-edge ribbon.

Each "panel" is exactly 1/3 of a sheet of paper — 3.67" x 8.5". Here, I printed one set, then realized it didn't print the same color as it was on-screen. I color-corrected and reprinted, then decided I kind of preferred the greener cast for this project. You can bet I turned over that cardstock and printed on the back! LOL

Confirm your layout. Block your toddler. Wish your shorts were longer.

I laminated the cardstock and trimmed, leaving a 1/8-1/4" border of plastic, and pressed around the edges to seal them more firmly.

I decided it wasn't quite weathered enough just to leave as-is, so out came the spray paint. This was the only white can I had. Hey, it also says "wood" on it. I also clear-coated it for longevity.

While it dried, I marked 1/4" from the top and bottom of each panel and marked the center so I could punch the holes. I chose a square hole punch so the ribbon would sit flat. IF I HAD IT TO DO OVER, I might punch my holes before I laminated, so the holes would also be weather-proof. Of course, you'll also have to punch the holes again, with a smaller-size punch, to leave a ring of protection around the hole. Okay, nevermind. I'd just do it the same way again.

Since I didn't punch them first, I clear-coated them instead.

If you do it this way, be sure to wipe off the excess, front and back.
 Center your panel, measure from the edge of your frame (L) to the panel's nearest hole, double that number, and add whatever you think you'll need for tying it or gluing it.
Also measure in the "middles" from hole to hole, double it, and add whatever you think you'll need for tying it or gluing it.

My random ribbon stash roll had enough for all six edge ribbons and all six middle ribbons, plus a little bit left over. Yay!

Here are my measurements. I chose to add 2" to each ribbon for overlap, since I plan to glue, not tie/bow.

After laying out my panels on the table and threading each ribbon through, I realized that I needed to glue on the backside, not the front. So flip your panels onto their backs, being sure to reverse them left-to-right as well (like a mirror image).

Then lower the frame (also upside-down) over top of them and straighten out your panels.

The pretty centers of the ribbon should be under the upside-down frame, so they end up in front of the frame when you turn it over.

Tape down your frame to the work surface. Center your panels and tape them down too.

Pull the end ribbon taut (or leave it loose if you prefer that look).

Hot glue it profusely while it's still taut — don't let your slack go!
 Overlap your middle ribbon ends and hot glue profusely, maintaining tautness.
I was almost afraid to turn it over...

Ta-da! Just great! I'd initially toyed with the idea of hanging it on the front door itself, since I'm plagued with only making wreaths-that-don't-fit-behind-the-storm-door-without-squishing, but the brick next to the door needed it more. Now, it just needs a hanger to fit over the porch light.
 I took the leftover ribbon (27.25" if you're wondering) and taped about 2" of one end to some scrap paper, then aligned it where I wanted one end of the hanger to be (aligned with one of the interior frame slats). I looped the ribbon over and taped down the other end where I wanted it to be (aligned with the other interior frame slat). Clear as mud? (BTW, that's not a real bath pouf; it's the one we use for painting.)
Before I untaped the ribbon, I marked where it hit the edge of the back of the frame (not the top of the decorative front, the putty-colored back support thing). The marks won't show if you lay the ribbon facedown.

To give it a more polished look — and for strength — I cut another length of ribbon off of the second roll of matching ribbon, which I so fortuitously had in my stash. I made that ribbon double the first one (54.5" instead of 27.25") so I could double it over, making the hanger look like three ribbons. If I was doing this project from a new roll, I'd just make it the full 81.75" and fold it over twice.

Eeek! My first staple gun experience! (Thank you, honey, for buying me a brand new staple gun to replace the "bargain" I found at the ReStore for which staples are no longer made.) I used 1/4" staples.
 Yes, my left hand went on top of the end of the stapler when I stapled; my husband just happened to take an in-between picture.

Before I stapled, I taped the three ribbons together at both ends. First I placed the stack of ribbons on the center of a piece of tape, thereby securing the bottom ribbon. Then, with the top ribbon out of the way, I folded one end of the tape over the center ribbon in the stack.

Then I laid the third ribbon back on top and secured it with the other flap of tape. My wonky method kept the center ribbon from shifting as I worked.

Now it hangs!
 I thought I was finished, but it looked kind of...stark and geometric. It needed something to pull out the flowing, feminine details and balance all the harsh lines, but without competing with the busy patterns OR ruining the orderly flow of the piece. I decided on matching ribbon rosettes. After much deliberation, it became clear that the least-obtrusive place for them was at the hanger points.
Once I figured out the size I wanted (by holding it up to the frame, above), I measured the span of the rosette, just in case I accidentally let go before gluing.

Turns out you can just use a tiny dab of hot glue on a project. Who knew?

After many agonizing minutes debating center pieces, I ended up using small, clear rhinestones (leftover from our wedding — be sure to ask "from what", if you want a super-clever idea for your wedding).

Ahh, that's better!
 The great thing is, you could totally make this reversible for the seasons. Just paint both sides (even two different colors, if you're careful!) and print different patterns/quotes/letters/pictures on the back side of each panel. Maybe your family name? A holiday message? All you'd have to do to make it reversible is secure the ribbon in a different way (or just tie each one as a bow), add something fancy to cover up the staples on the back, and voila! Transitional, seasonal decor. You could even make it switch-out-able if you wanted.
I chose to use these patterns because I love them and already have them in my house, but fortunately the palette is appropriate for every season except winter. Good thing I have that jingle bell thing to replace it with! You know, I toyed with the idea of using this as a two-sided indoor piece to display our house rules (which have yet to be posted in our house), since we have 9 family rules and 9 life rules, but I didn't want to have to turn it over every time I referred to it.
ETA: My cold lamination did not hold up well to rain. I got water damage all around the edges of the panels and, particularly, around the holes I punched for the ribbon. I've got a couple of mods in the works, so stay tuned!
Thanks for reading! PLEASE comment — I love them! Or even better, follow! :D